
Pop rivets are one of the most popular types of blind fasteners. Professionals know that a pop rivet provides a lasting joint which won’t loosen over time the way a bolt or screw would. These two-piece blind rivets are easy to set, extremely strong, and can be used with all sorts of materials from metal to plastics. However, the pop rivet needs to be properly set to get maximum performance.
Pop rivets have a variety of applications in construction, manufacturing, and repair. Pop rivets are lightweight and made of various materials for specific applications and different finishes. Pop rivets can be used with metals, wood, and even plastics, but you must have the right pop rivet gun or tool to set the rivet correctly without crushing the materials.
Pop rivets are set in the same fashion as most blind rivets, from one side of the joint with a pop rivet tool. Understanding the different types of pop rivets will give you a better appreciation for the various pop rivet applications and installations.
What Are Pop Rivets?
Like any blind rivet, pop rivets are designed to be installed from one side of the material, so you don’t need to access the backside. They are fast, easy to install, and often used in assembly lines and manufacturing settings to make everything from aircraft to automobiles to consumer electronics.
The name “pop rivet” comes from the sound the mandrel makes when it is snapped off. Pop rivets were initially developed for aircraft manufacturing in the early 20th century. British inventor Hamilton N. Wylie created the method to install tubular rivets from one side rather than have two installers use a hammer and bucking board from either side. Since pop rivets could be set on one side by one worker, they were immediately adopted for assembly work.
The pop rivet design is relatively simple. The rivet has a shank and a mandrel that fits through the shank. To install the pop rivet, the shank is inserted into a predrilled hole and then the mandrel is pulled out of the shank using a pop rivet tool. Pulling the mandrel collapses the rivet on the blind side while cinching the workpiece materials together. Once the rivet is set, the pop rivet gun snaps off the mandrel for a clean finish.
Types of Pop Rivets
Pop rivets have evolved over the years, and today they are made of different materials for different applications:
- Standard pop rivets: These types of rivets are often used for metal-to-metal fastening in the automotive, construction, container, HVAC, and other industries, and have dome-shaped heads.
- Sealed pop rivets: Used in air conditioners, containers, and waterproof applications, sealed pop rivets have an enclosed head.
- Peeled pop rivets: As the name implies, peeled rivets look like flower petals on the blind side, increasing the size of the bearing surface to prevent pullout.
- Grooved pop rivets: For soft materials or when extra holding power is needed, grooved rivets have grooves in the shank that expand when the mandrel is pulled to grip against the sides of the hole using friction.
- Multi-grip pop rivets: For joining plastic-to-plastic and metal-to-metal, multi-grip rivets have indents on the rivet body that expand to create multiple friction grips when the mandel is withdrawn.
- Soft-set pop rivets: Soft-set rivets are another form of standard rivet made of softer materials—such as aluminum—for use with fragile materials.
- Dome head pop rivets: Dome head rivets are ideal for connecting materials of different thicknesses, and compress the materials using a larger bearing surface.
- Large head pop rivets: The large head rivet has double the bearing area of a dome head rivet and is ideal for connecting soft and hard materials, such as plastics to metal.
- Countersunk pop rivets: The head of a countersunk rivet remains flush with the material surface for a smooth finish after installation.
How to Set Pop Rivets
Installing pop rivets is easy once you understand what type you need. Choose an appropriate pop rivet for the materials. You can use a standard stainless steel pop rivet or some other hard substance for metalwork. When working with plastics, choose a softer material for the pop rivet and be sure the load-bearing area on the blind side is large enough to stop it from pulling out.
Pop rivets are made of steel, stainless steel, nickel, nickel-copper alloy, copper, and aluminum. Each pop rivet type has different performance characteristics, so choose the suitable rivet material for the task.
You also need to choose the right pop rivet tool. You want to use a tool that will securely set the rivet without crushing the material.
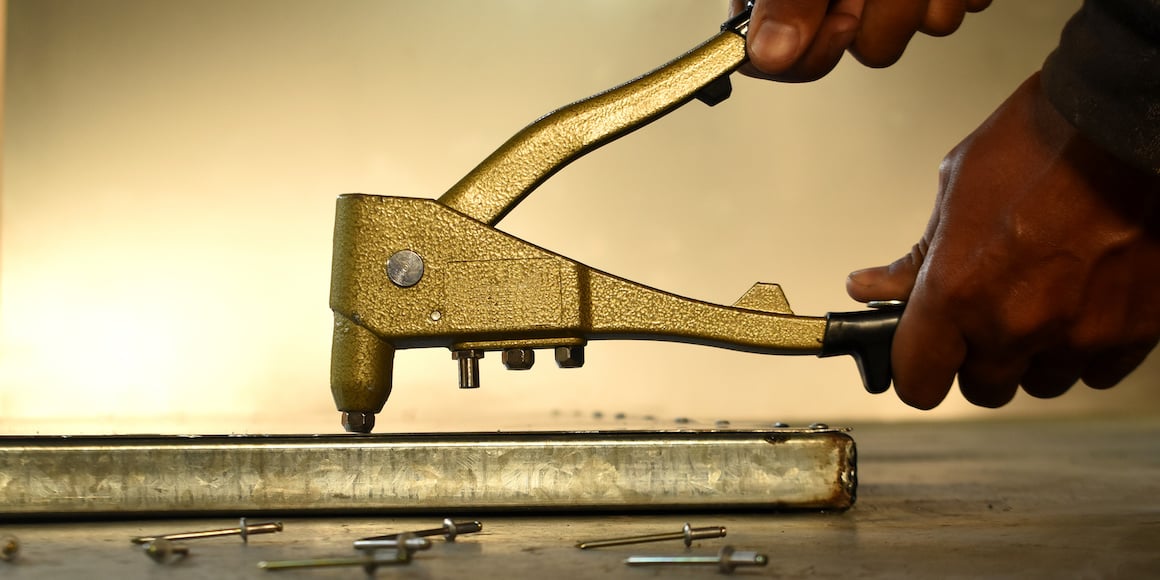
Manual rivet tools are best for small tasks or repair work. Manual tools usually have long handles to offer additional leverage to set the rivet. Other manual rivet tools look like oversized pliers. Popular manual rivet tool brands include Avdel, Cherry Aerospace, FAR, Gage Bilt, Huck, and Marson.
Cordless rivet tools are becoming more popular as battery technology continues to mature. Lithium-ion batteries are lighter, hold a charge longer, and recharge faster, and manufacturers are standardizing battery designs to make battery packs interchangeable. Battery-powered rivet tools from manufacturers like Avdel, AVK, Gesipa, Huck, and STANLEY Engineered Fastening are increasingly used for construction and assembly work.
Hydraulic and pneumatic rivet tools are still preferred for assembly lines or repetitive installations because they are fast, powerful, and consistent. You also can set the pressure on hydraulic riveters so that you don’t crush the materials. Atlas, FAR, Gesipa, Lobster, and STANLEY are among the most popular brands of pneumatic riveting tools.
Using a pop rivet tool isn’t difficult, and the procedure is basically the same for all types of pop rivets:
- Choose the correct rivet type for the job, including size and materials.
- Place the rivet in the pre-drilled hole through both materials until the flange is flush with the joint.
- Squeeze the trigger on the rivet tool. The tool will then pull the mandrel, collapsing the rivet on the blind side.
- The sound of the pop is the tool breaking off the mandrel, so that the rivet collar becomes the rivet head.
- The mandrel is then collected, either manually or by a receptacle built into the tool.
Of course, there are different nose pieces and set pressures for different pop rivets and installations. The Bay Supply Fastener Marketplace has pop rivets and pop rivet tools for every application. To learn more about the available pop rivet tools, why not start with our Ultimate Guide to Cordless Rivet Tools?


Comments